Capturing and Relating Information
The simplest way to capture data into EVA Netmodeler is to use the Item Browser. Start by selecting the item browser tab from the top navigation bar. This will open a window containing five panes. Please refer
to the Item Browser help item for detailed information on the layout of this browser. The remainder of the section assumes that you are familiar with the Item Browser.
Capturing a new item
In the top left pane select the type of item you wish to work with. In this example, we will work with a Business Unit. Click the new
button below the item type selector box after you have selected the business unit item type.
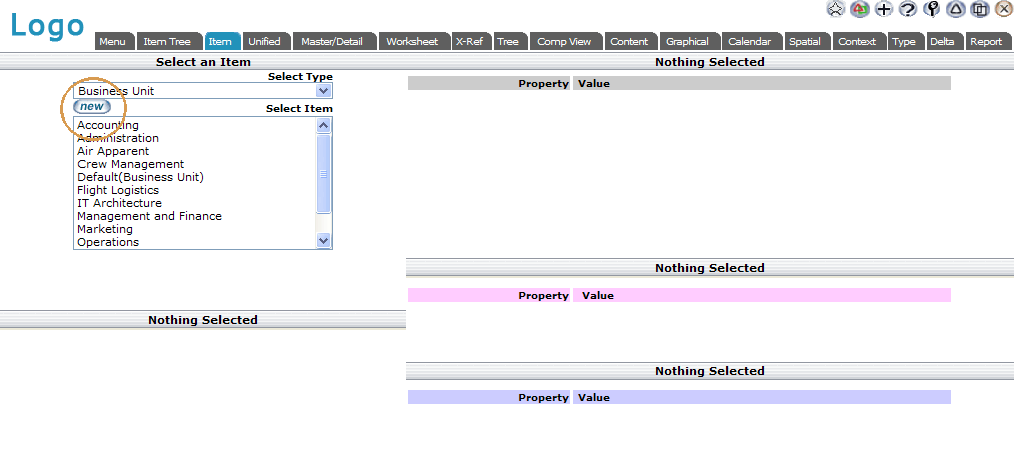
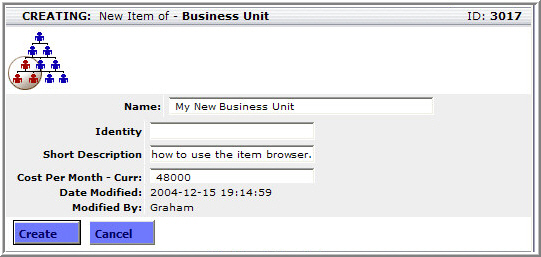
This will shift the focus to the top right frame and open a new business unit item for editing. Enter as many of the properties as you have available. When you have finished editing the item, click the create
button at the bottom of the frame to create the item in the repository.
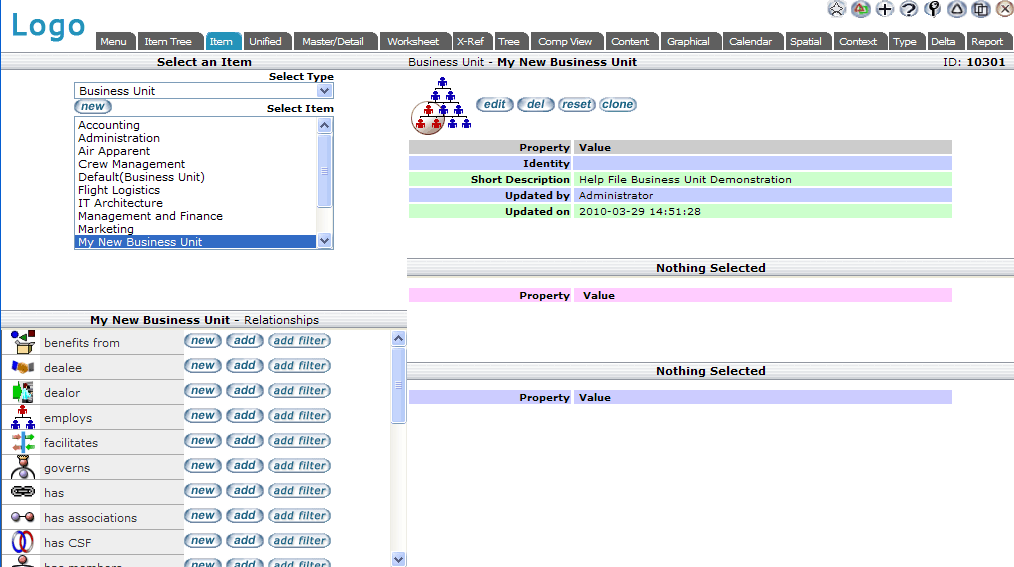
This will create a new item and display the list of possible relationship types in the bottom left-hand pane.
Relationship Capture
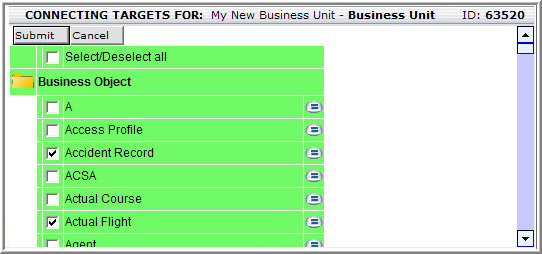
To link the item to an existing item in the repository click the add button next to the appropriate relationship name. A full list of
possible target items will be displayed in the bottom right-hand frame. If there is more than one legal target for the selected
relationship type the possible target items will be grouped under the item types. Simply tick the check boxes next to the items that you want and click the submit
button at the top of the related item frame to relate the selected items to the newly created Business Unit.
Creating and Linking in One Step
If the item to which you wish to link is not the really exist in the repository. Simply click the new button next to the relationship
name. If the selected relationship has more than one legal target type, a list of legal target item types will be displayed in the
bottom right-hand frame. Select the appropriate item type from the drop-down list box and click the submit button.
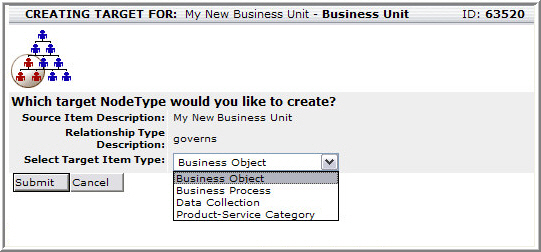
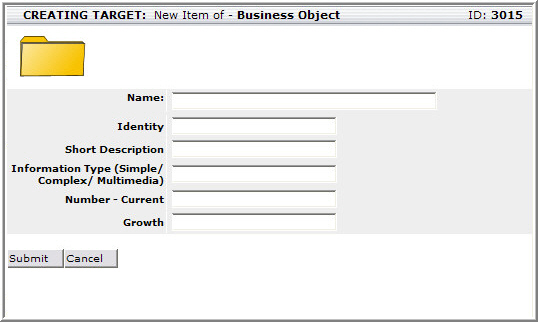
This will open a dialogue to create the new item. When you click the submit button to create a new item type it will automatically be linked to the current item.
Using a "link with filter"
If you wish to add relationships to a number of existing items you can use the add filter button in the relationship frame. This will
open an item filter dialogue in the related item frame. For each type of item that you wish to relate you can specify a filter for the
item name, the value of one of the properties and for the presence or absence of a related target item.
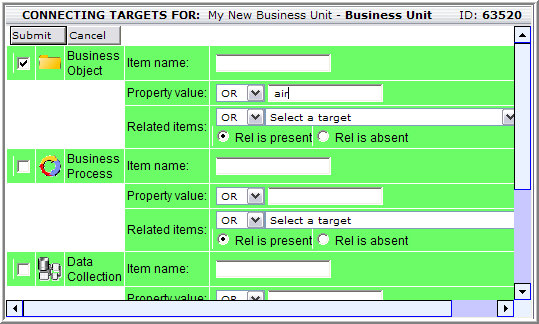
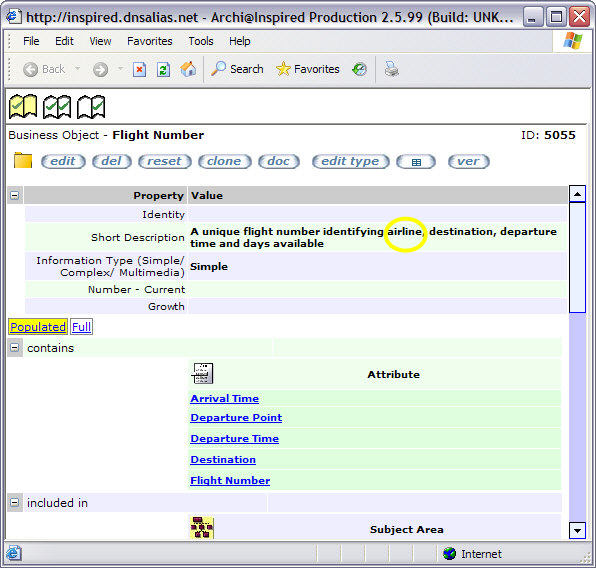
For example you could specify that you only want to see related items of the type business object that have a property value containing the word "Air". In out example the following list of possible target items was returned.
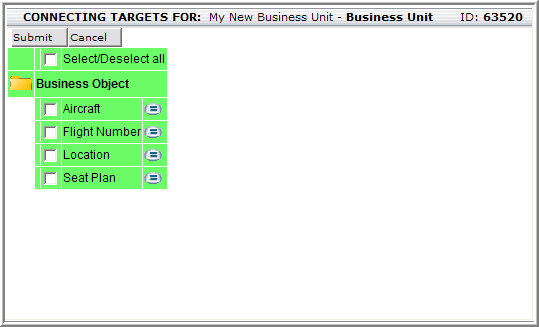
Although it is not immediately apparent why the item Flight Number" was returned, clicking the (=) buton to display its details
reveals that it has a property that contains the word "Air", which is what our search criteria specified.
Updating Multiple Relationships in a Matrix View
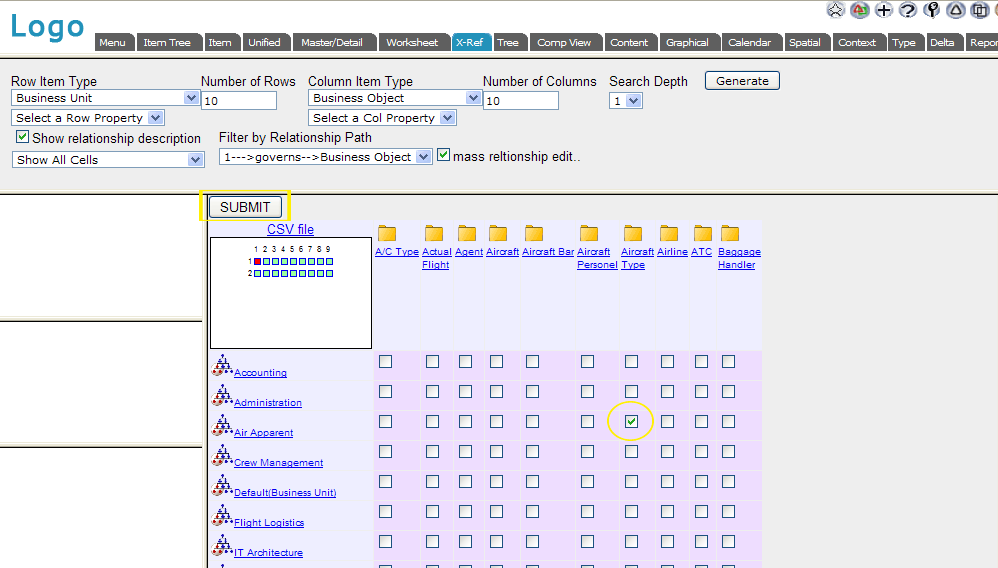
EVA Netmodeler provides a mechanism to capture many relationships between exiting items at once using the Cross Reference Browser. To do this you open the cross reference browser, specify the row and column item types and select the
mass relationship edit option.

This generates a matrix with a check-box in each row / column intersection and existing relationships shown with a check in the
check-box. You can now remove existing relationships and / or add new relationships between the items in the matrix. Click the submit button to commit the changes to the repository. Note that you must submit
your changes on each page or all the changes made on the current page will be discarded.
Capture via Importing
Data can be imported directly into the repository if the data already exists in electronic form. This process involves:
- Deciding which data types in the repository will be used to represent the data
- Deciding which relationship types will be used to record the relationships between the data items
- Formatting the data in a way that can be understood by the repository import facilities. This involves compiling an XML file or a Comma Separated Values (CSV) file containing the data. EVA Netmodeler
can assist with this process by generating a spreadsheet with the correct structure, or meta-data, thereby greatly simplifying the task of formatting the data in preparation for import.
- Running the import utility against the the import file and validating the results.
Refer to the section on Exchanging Data for more details on how to use these facilities.
Capture from Other Tools
EVA Netmodeler provides two Application Programmer Interfaces through which other applications can communicate with the EVA Netmodeler repository. These are the :
- AGMCGI, which is a standard web server Common Gateway Interface, further described in the AGMCGI Interface section
- ARCHIREQUESTER, which is a COM component which presents a slightly more abstract API to COM based clients
Both interfaces are discussed in detail in the Visual Modeling Interface section.
Spreadsheets
Many organizations have a lot of base data captured either directly in spreadsheets, or in other applications that provide a spreadsheet export facility. This data can be easily imported into
EVA Netmodeler using the EVA Netmodeler data exchange tools. Refer to the section on Exchanging Data for more details on how to use these facilities.
|